If you’re eager to share your audio creations or favorite tracks on YouTube directly from your iPhone, you’ve come to the right place. In this guide, we’ll walk you through how to upload audio to youtube from iphone, ensuring that your music or podcasts reach a wider audience on this popular platform.
First, ensure that you have the YouTube app installed on your iPhone and that you’re signed in to your YouTube account. If you don’t have the app, you can download it from the App Store. Once you’re signed in, tap on the ‘Camera’ icon at the bottom of the screen. This will open up the YouTube app’s recording interface.
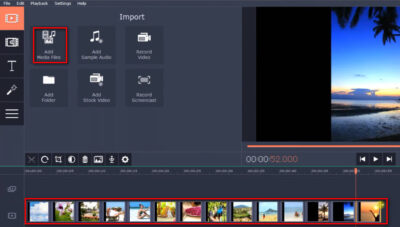
To upload audio, you can’t directly upload an audio file like you can with videos, but you can create a video with a static image or a simple video loop and then add your audio to it. To do this, tap on the ‘Library’ option at the bottom, and then select ‘Create video.’ From there, you can choose a static image or a video loop as the background for your audio.
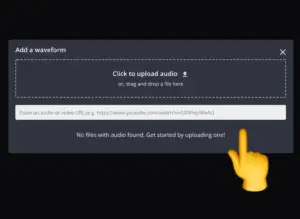
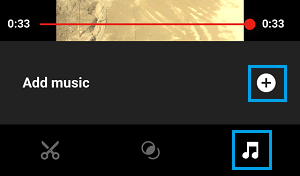
Now, you can add your audio. Tap on the ‘Music note’ icon at the top right corner of the screen. You can either select music from the YouTube audio library or choose ‘Your Music’ to select an audio file from your device. Once you’ve added your audio, you can trim it if needed and adjust the audio settings. After you’re satisfied, tap ‘Done.’
Why can’t I directly upload audio files to YouTube?
There are a few reasons why you can’t directly upload audio files to YouTube:
- YouTube is a video platform. YouTube is primarily designed for sharing videos, so it makes sense that it only supports video file formats.
- Copyright protection. YouTube has a strict copyright policy in place to protect the rights of content creators. If you were able to upload audio files directly to YouTube, it would be too easy for people to upload copyrighted music without permission.
- User experience. YouTube wants to provide a good user experience for its viewers. This means that videos should be easy to watch and discover. Having a separate platform for audio files would make it more difficult for people to find the content they’re looking for.
If you want to upload an audio file to YouTube, you need to first convert it to a video file. There are many different ways to do this, including using video editing software, online converters, and even some YouTube apps.
Once you have converted your audio file to a video file, you can then upload it to YouTube like any other video. You can add images, text, and other effects to your video to make it more visually appealing.
What video formats does YouTube support?
YouTube supports a wide variety of video formats, including:
- MP4
- MOV
- MPEG-1
- MPEG-2
- MPEG4
- MPG
- AVI
- WMV
- MPEGPS
- FLV
- 3GPP
- WebM
- DNxHR
- ProRes
- CineForm
- HEVC (h265)
However, YouTube recommends that you upload your videos in MP4 or MOV format with the H.264 video codec and the AAC audio codec. This will ensure that your videos are compatible with the widest range of devices and browsers.
If you are unable to encode your videos in MP4 or MOV format, you can still upload them in one of the other supported formats. However, YouTube may re-encode your videos to make them compatible with its platform. This could result in a decrease in video quality.
How can I convert my audio file to a video format?
There are many different ways to convert an audio file to a video format. Here are a few options:
- Use video editing software. Most video editing software, such as Adobe Premiere Pro, Final Cut Pro, and DaVinci Resolve, can be used to convert audio files to video files. To do this, simply import your audio file into the software and then export it as a video file.
- Use an online converter. There are many different online converters that can be used to convert audio files to video files. To use an online converter, simply upload your audio file to the website and then select the video format you want to convert it to.
- Use a YouTube app. There are also some YouTube apps that can be used to convert audio files to video files. For example, the YouTube Studio app for iOS and Android allows you to create videos from audio files.
Here is a step-by-step guide on how to convert an audio file to a video format using an online converter:
- Go to an online converter website, such as Clideo or Zamzar.
- Click the “Choose file” button and select the audio file you want to convert.
- Select the video format you want to convert the audio file to.
- Click the “Convert” button.
- Once the conversion process is complete, click the “Download” button to save the video file to your computer.
Once you have converted your audio file to a video file, you can then upload it to YouTube like any other video.
What are some good apps for converting audio to video on iPhone?
Here are some good apps for converting audio to video on iPhone:
- Video Converter & Video Compressor
- Media Converter
- Video Converter: MP4, MOV, AVI, 3GP Converter
- Video to MP3 Converter & File Manager
- Video Converter Pro
These apps all offer a variety of features, including the ability to convert audio files to a variety of video formats, including MP4, MOV, and AVI. Some of the apps also offer additional features, such as the ability to edit videos, compress videos, and add subtitles.
How do I upload a converted audio file to YouTube from iPhone?
To upload a converted audio file to YouTube from iPhone, follow these steps:
- Open the YouTube app on your iPhone.
- Sign in to your YouTube account.
- Tap the “+” button in the top right corner of the app.
- Select “Upload video.”
- Tap the “Choose file” button and select the converted audio file you want to upload.
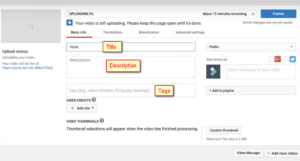
- Enter a title and description for your video.
- Select the privacy settings for your video.
- Tap the “Upload” button.
YouTube will start uploading your video. The upload time will vary depending on the size of your video and your internet speed.
Once your video has been uploaded, you can view it on your YouTube channel. You can also share it with others by sending them the link to your video.
Here are some additional tips for uploading videos to YouTube from iPhone:
- Make sure your video is in a supported format. YouTube supports a wide variety of video formats, but the recommended format is MP4.
- Choose a video resolution and frame rate that is appropriate for your content. For example, if you are uploading a music video, you may want to use a higher resolution and frame rate.
- Set the correct aspect ratio for your video. YouTube recommends using a 16:9 aspect ratio.
- Keep your video file size under 2GB.
- Add a thumbnail to your video. This is the image that will appear next to your video in search results and on your YouTube channel.
- Add tags to your video. This will help people find your video when they search for keywords related to your content.
Can I add images or text to my audio video before uploading it to YouTube?
You can add images and text to your audio video before uploading it to YouTube. There are a few different ways to do this:
- Using a video editing software
Most video editing software programs, such as Adobe Premiere Pro, Final Cut Pro, and iMovie, have the ability to add images and text to videos. To do this, simply import your audio video into the software and then create a new video project.
Once you have created the new project, you can add your images and text to the timeline. Once your images and text are on the timeline, you can export the project as a video file.
- Using an online video editor
There are also a number of online video editors that allow you to add images and text to videos. To use an online video editor, simply upload your audio video to the website and then add your images and text to the video. Once you have finished editing your video, you can download it to your computer or upload it directly to YouTube.
- Using a mobile video editor
There are also a number of mobile video editors that allow you to add images and text to videos. To use a mobile video editor, simply download the app to your phone or tablet and then import your audio video into the app.
Once your audio video is in the app, you can add your images and text to the video. Once you have finished editing your video, you can save it to your phone or tablet or share it with others.
Here are some tips for adding images and text to your audio video:
- Choose images and text that are relevant to your video.
- Make sure that your images and text are high quality.
- Use fonts and colors that are easy to read.
- Place your images and text in a location where they will not be blocked by other elements in your video.
- Use animations and transitions to make your images and text more engaging.
How do I change the background of my audio video?
Changing the background of a video or audio can be done through various methods, depending on your specific needs and the tools you have available. Here are some common methods for changing the background of your video or audio:
-
Video Editing Software (for Video):
- Use video editing software like Adobe Premiere Pro, Final Cut Pro, or DaVinci Resolve.
- Import your video and use the software’s masking and keying tools to remove the existing background and replace it with a new one.
- Ensure your subject is properly lit and that there’s a clear contrast between the subject and the background for better results.
-
Green Screen (Chroma Keying):
- Shoot your video in front of a green or blue screen (chroma key background).
- In your video editing software, use the chroma key effect to remove the green or blue background and replace it with a new one.
-
Online Video Editors:
- There are several online video editing tools like Kapwing, Clipchamp, or Canva that offer background removal and replacement features. Upload your video and follow the instructions provided by the platform.
-
Background Replacement Apps:
- Some smartphone apps, like Zoom and Snapchat, offer real-time background replacement during video calls or recording. You can choose from a variety of preset backgrounds.
-
Audio Editing Software (for Audio):
- For audio, you can use software like Adobe Audition, Audacity, or GarageBand.
- Use noise reduction tools to reduce background noise and enhance the audio quality.
-
AI-Powered Background Removal Tools:
- Some AI-powered tools, like Remove.bg, offer automatic background removal for both images and videos. You can then add a new background using video editing software.
-
Virtual Backgrounds (Video Conferencing):
- Many video conferencing tools like Zoom and Microsoft Teams allow you to use virtual backgrounds during video calls. You can select a pre-made virtual background or upload your own.
-
Professional Services:
- If you require high-quality, precise background removal or replacement, you may consider hiring a professional video editor or post-production specialist.
Remember that the success of changing a background largely depends on the quality of your original video or audio recording, lighting conditions, and the tools you have at your disposal. For the best results, ensure that your subject is well-lit, and there’s a clear distinction between the subject and the background you want to replace.
How do I add a soundtrack to my audio video?
To add a soundtrack to your audio video, you can use video editing software. Here are the general steps you can follow:
- Choose Video Editing Software: Start by selecting a video editing software that suits your needs and is compatible with your computer. Some popular options include Adobe Premiere Pro, Final Cut Pro (for Mac), iMovie (for Mac), and various free options like HitFilm Express and DaVinci Resolve.
- Import Your Video and Soundtrack: Open your chosen video editing software and import your video clip by dragging and dropping it into the timeline. Then, import your desired soundtrack by adding it to a separate audio track or layer in the timeline. Most video editing software will allow you to have multiple audio tracks.
- Sync Audio and Video: Ensure that your audio and video are synced correctly. You can do this by aligning the waveform of the soundtrack with the video’s timeline. Many video editing programs have tools to help you align audio and video precisely.
- Adjust Sound Levels: Adjust the volume levels of both the original video’s audio and the added soundtrack to achieve the desired balance. You can usually do this by adjusting the volume sliders or using keyframes to control the audio levels throughout the video.
- Trim and Edit: Trim the soundtrack and video as needed. You can cut, trim, and arrange the clips in the timeline to match the desired video and audio sequence.
- Add Transitions (Optional): If you want to smooth transitions between different parts of your video or soundtrack, you can add transitions, fade-ins, and fade-outs as needed.
- Export Your Video: Once you are satisfied with the editing, export your video. Choose the appropriate export settings, including the video resolution, format, and quality.
- Save Your Project: Save your project file in case you need to make future edits.
- Review and Test: After exporting, review the final video to ensure that the soundtrack is in sync and the audio levels are balanced correctly. Make any necessary adjustments and re-export if needed.
- Share Your Video: Once you are happy with the final result, you can share your video on social media, upload it to YouTube, or use it for any other intended purpose.
The specific steps may vary depending on the video editing software you are using, but these general guidelines should help you add a soundtrack to your audio video. Be sure to refer to the documentation or tutorials for your chosen software for more detailed instructions if needed.
How do I trim the length of my audio video?
There are many different ways to trim audio and video, depending on the software you are using. However, the general steps are similar:
- Open your audio or video file in the editing software.
- Identify the start and end points of the section you want to trim. This can be done by playing back the file and dragging the playhead to the desired positions.
- Use the trim tool to remove the unwanted sections of the file. This is usually done by clicking and dragging the trim markers to the desired positions.
- Preview the trimmed file to make sure you are happy with the results.
- Save the trimmed file.
Here are some specific instructions for trimming audio and video in popular software applications:
Audacity
- Open the audio file in Audacity.
- Select the section you want to trim by dragging the cursor over it.
- Click the Trim button in the toolbar.
- Click File > Export to save the trimmed file.
Adobe Premiere Pro
- Import the video file into Premiere Pro.
- Drag the video clip to the timeline.
- Use the Trim tool to trim the beginning and end of the clip.
- Click the Export button to save the trimmed file.
iMovie
- Open the video file in iMovie.
- Click the Trim button above the timeline.
- Drag the yellow trim handles to the beginning and end of the section you want to trim.
- Click the Trim button again to finish trimming.
- Click File > Share > Export File to save the trimmed file.
Online tools
There are also a number of online tools that you can use to trim audio and video. Some popular options include:
- Clideo
- Kapwing
- Movavi Online Video Editor
- Online Video Cutter
To use an online tool to trim audio or video, simply upload your file to the tool’s website and select the section you want to trim. The tool will then trim the file and save it for you to download.
No matter which method you choose, trimming audio and video is a relatively easy process. With a little practice, you’ll be able to trim your files quickly and easily.
How do I add a thumbnail to my audio video?
Trimming the length of your audio or video can be done using various software tools, depending on your needs and preferences. Here’s a general guide on how to trim audio and video files:
- Use Video Editing Software:
-
For Video: Software like Adobe Premiere Pro, Final Cut Pro, iMovie (Mac), or even free options like DaVinci Resolve or HitFilm Express can help you trim videos. Here’s how to do it:
- Import your video into the software.
- Place the video on the timeline.
- Locate the portion of the video you want to trim.
- Use the “split” or “cut” tool to divide the video at the desired start and end points.
- Delete the unwanted segments.
- Export the edited video.
-
For Audio: You can use software like Audacity (free), Adobe Audition, or GarageBand (Mac) for audio trimming:
- Import your audio file into the software.
- Zoom in on the waveform to precisely locate the start and end points.
- Use the selection tool to highlight the portion you want to keep.
- Delete the unwanted segments.
- Export the edited audio.
- Use Online Tools:
- There are many online tools that allow you to trim audio and video files without the need to install software. Some popular options include:
- Online Video Cutter
- Clideo
- Kapwing
- Online Audio Cutter
- MP3Cut
These tools typically have a user-friendly interface where you can upload your file, select the start and end points, and then save the trimmed version.
- Use Command-Line Tools:
- If you’re comfortable with the command line, you can use tools like FFmpeg to trim audio and video files. Here’s an example command to trim a video using FFmpeg:
cssCopy code
ffmpeg -i input.mp4 -ss 00:00:10 -to 00:01:30 -c:v copy -c:a copy output.mp4
In this example, -ss specifies the start time, and -to specifies the end time.
- Smartphone Apps:
- Many smartphone apps, both for Android and iOS, are available for trimming audio and video. Apps like InShot, Kinemaster, and Adobe Premiere Rush offer basic editing capabilities.
- Use a Dedicated Video Cutter/Trimmer:
- There are also standalone video cutter and trimmer software available. These tools are designed specifically for quick and easy trimming without the complexity of full-fledged video editing software.
The specific steps may vary depending on the software or tool you choose, but the general process involves importing your media, selecting the desired portion, and then saving the trimmed file. Be sure to save your original file separately if needed, as trimming is usually a destructive process that permanently removes the unwanted parts.
Adding a thumbnail to your audio video is a great way to make it more visually appealing and attention-grabbing. It can also help to give viewers a better idea of what the video is about.
There are a few ways to add a thumbnail to your audio video. One way is to use a video editing software. There are many different video editing softwares available, both free and paid. Some popular options include:
- Adobe Premiere Pro
- DaVinci Resolve
- Final Cut Pro X
- iMovie
- Windows Movie Maker
To add a thumbnail to your audio video using a video editing software, follow these steps:
- Import your audio video into the software.
- Create a new image file that you want to use as your thumbnail. The image file should be square and have a resolution of at least 1280×1280 pixels.
- Import the image file into the video editing software.
- Drag and drop the image file onto the timeline below your video track.
- Trim the image file to the desired length.
- Export the video with the new thumbnail.
Another way to add a thumbnail to your audio video is to use an online video thumbnail maker. There are many different online video thumbnail makers available, some of which are free and some of which require a subscription. Some popular options include:
- Canva
- Fotor
- Adobe Spark
- Snappa
- Pixlr
To add a thumbnail to your audio video using an online video thumbnail maker, follow these steps:
- Go to the website of the online video thumbnail maker you want to use.
- Create a new account or sign in to your existing account.
- Select the option to create a video thumbnail.
- Upload your audio video to the online video thumbnail maker.
- Choose a template or design for your thumbnail.
- Customize the thumbnail with text, images, and other elements.
- Export the thumbnail and save it to your computer.
Once you have created a thumbnail for your audio video, you can upload it to the video sharing platform where you plan on sharing your video. Most video sharing platforms, such as YouTube and Vimeo, allow you to upload a custom thumbnail for your videos.
How do I publish my audio video to YouTube?
Publishing audio and video content on YouTube involves several steps. Here’s a general guide to help you get started:
-
Create Your Content:
- Prepare your audio and video content. Make sure it is well-edited and of good quality. You can use video editing software like Adobe Premiere Pro, Final Cut Pro, or free options like DaVinci Resolve or HitFilm Express.
-
Sign in to Your YouTube Account:
- You need a Google account to upload videos to YouTube. If you don’t have one, create a Google account first.
-
Upload Your Video:
- Click on the “Create” button at the top-right corner of the YouTube homepage, then select “Upload Video.”
- Select the video file from your computer to upload. While the video is uploading, you can add a title, description, and tags to your video.
-
Video Details:
- Fill out the video details, including a descriptive title, a thorough description, and relevant tags. This helps your video be discovered by viewers.
-
Thumbnail:
- Create or select a custom thumbnail image for your video. This image should be eye-catching and represent your content.
-
Privacy Settings:
- Choose the privacy settings for your video. You can make it public, unlisted, or private. Public videos are visible to anyone, unlisted videos are only accessible via a link, and private videos are visible only to people you invite.
-
Monetization (Optional):
- If you want to monetize your videos by running ads or using other monetization methods, you can set this up in your YouTube Studio. Keep in mind that you need to meet certain criteria to be eligible for monetization.
-
Advanced Settings:
- In the “Advanced settings,” you can specify various options, including video category, recording date, and more.
-
Captions and Subtitles (Optional):
- You can add captions and subtitles to make your content more accessible. YouTube provides tools to help create and upload captions.
-
End Screens and Cards (Optional):
- Add end screens and cards to promote your other videos, channels, or external websites within your video.
-
Video Elements (Optional):
- Enhance your video by adding music, annotations, or interactive elements using the YouTube video editor.
-
Publish Your Video:
- Once you’ve filled out all the necessary details and settings, click the “Publish” button to make your video live on YouTube. If you chose “Unlisted” or “Private” privacy settings, you can share the video link with your intended audience.
-
Share Your Video:
- Promote your video by sharing it on social media, your website, or through other marketing channels to increase its visibility.
Remember that YouTube has specific community guidelines and copyright policies. Make sure your content adheres to these guidelines to avoid any issues with your videos being taken down or your channel being penalized.
Additionally, YouTube’s interface and features may change over time, so be sure to refer to YouTube’s official Help Center for the most up-to-date information and tutorials on uploading and managing your content on the platform.
How can I promote my audio video on YouTube?
Promoting your audio and video content on YouTube can help you reach a wider audience and gain more views, subscribers, and engagement. Here are several strategies to promote your content effectively on the platform:
-
Optimize Video Titles, Descriptions, and Tags:
- Use relevant and compelling video titles that include keywords related to your content.
- Write detailed and informative video descriptions that provide context and include keywords.
- Add tags that are relevant to your video, making it easier for users to find your content through search.
-
Create Eye-catching Thumbnails:
- Design custom thumbnails that are visually appealing and represent the content of your video. A compelling thumbnail can entice viewers to click on your video.
-
Engage with Your Audience:
- Respond to comments on your videos to build a community and encourage more interaction.
- Ask viewers questions or for their opinions within your video to encourage engagement.
-
Use Social Media:
- Share your video on your social media platforms, such as Twitter, Facebook, Instagram, and LinkedIn, to reach your existing followers.
- Join relevant online communities or forums where you can share your content, but make sure to follow community guidelines to avoid spamming.
-
Collaborate with Others:
- Collaborate with other YouTubers or content creators in your niche. Guest appearances or collaborations can introduce your channel to a new audience.
-
YouTube SEO:
- Research and implement YouTube SEO best practices, such as using relevant keywords in your video content, titles, and descriptions.
- Utilize YouTube’s search and discovery features like YouTube’s search bar, suggested videos, and trending topics.
-
Consistent Upload Schedule:
- Stick to a regular upload schedule so your subscribers know when to expect new content. Consistency can help retain and grow your audience.
-
Promote Playlists and Cards:
- Create playlists for your videos to keep viewers engaged and encourage them to watch more of your content.
- Use YouTube Cards and end screens to promote your other videos or playlists within your content.
-
Paid Promotion:
- Consider using YouTube Ads to promote your videos. You can target specific demographics and interests to reach a broader audience.
-
Email Marketing:
- If you have an email list, send out notifications to your subscribers whenever you publish a new video.
-
Engage with the YouTube Community:
- Participate in discussions on other YouTubers’ channels, leaving insightful comments and building relationships within your niche.
-
Utilize YouTube Analytics:
- Regularly review your YouTube Analytics to understand which videos are performing well and where your audience is coming from. Use this data to refine your content strategy.
-
Quality Content is Key:
- Ultimately, the best promotion for your videos is to consistently create high-quality, engaging, and valuable content. Viewers are more likely to share and recommend videos they find valuable.
Remember that growing your YouTube channel takes time and effort. Be patient and persistent in your promotion efforts, and over time, you can build a loyal audience for your audio and video content.
What are some tips for creating engaging audio videos?
Creating engaging audio videos involves a combination of good content, effective storytelling, and compelling visuals. Here are some tips to help you create audio videos that captivate and retain your audience:
-
Start with a Strong Hook:
- Begin your video with a compelling hook to grab the viewer’s attention immediately. This could be a thought-provoking question, a surprising fact, or an intriguing statement.
-
Tell a Story:
- Incorporate storytelling elements into your audio video. Humans are naturally drawn to stories, so use narratives, anecdotes, or examples to convey your message.
-
Keep It Concise:
- In the age of short attention spans, aim to deliver your message concisely. Get to the point quickly and avoid unnecessary filler.
-
Engaging Visuals:
- Use visuals that complement your audio content. This could include relevant images, animations, charts, or footage. Visuals should enhance, not distract from, the narrative.
-
Clear and Enthusiastic Voiceover:
- If you’re using voiceover narration, ensure that the voice is clear, enthusiastic, and well-paced. A monotone or mumbled voice can quickly lose the audience’s interest.
-
Add Background Music and Sound Effects (If Appropriate):
- Well-chosen background music can enhance the emotional impact of your video. Use sound effects sparingly and when they contribute to the narrative.
-
Vary Your Pace and Tone:
- Keep your audience engaged by varying the pace and tone of your narration. Use emphasis and inflection to highlight key points or add excitement.
-
Use Visual Transitions:
- Employ smooth transitions between visuals to keep the video visually appealing and avoid abrupt jumps.
-
Interactive Elements (If Possible):
- Incorporate interactive elements like quizzes, polls, or clickable annotations to engage your audience and make the video more interactive.
-
Engage with the Audience:
- Encourage audience engagement by asking questions, prompting discussions, or inviting viewers to share their thoughts in the comments section.
-
Create a Connection:
- Make an effort to connect with your audience on a personal level. Share personal experiences or relatable stories that build a sense of rapport.
-
Add Closed Captions and Subtitles:
- Make your content accessible to a broader audience by adding closed captions or subtitles, which can also improve engagement for viewers with hearing impairments or those watching in a noisy environment.
-
End with a Call to Action (CTA):
- Conclude your video with a clear and relevant CTA. This could be subscribing to your channel, liking the video, sharing it, or visiting your website for more information.
-
Test and Iterate:
- Analyze the performance of your audio videos using YouTube Analytics or other tracking tools. Pay attention to viewer retention rates and engagement metrics. Use this data to refine your future content.
-
Stay Consistent:
- Maintain a consistent style and format for your audio videos. This helps build brand recognition and keeps your audience coming back for more.
Remember that the key to creating engaging audio videos is to provide value to your audience. Focus on delivering content that informs, entertains, or solves a problem for your viewers, and you’ll be more likely to keep them engaged and interested in your videos.
What are some common mistakes to avoid when uploading audio videos to YouTube?
When uploading audio videos to YouTube, it’s important to avoid common mistakes that can negatively impact the visibility and performance of your content. Here are some common errors to steer clear of:
-
Low-Quality Audio and Video:
- Poor audio and video quality can turn viewers away. Invest in good recording equipment and editing software to ensure your content looks and sounds professional.
-
Ignoring SEO Best Practices:
- Neglecting to use relevant keywords in your video titles, descriptions, and tags can make it difficult for your content to be discovered through search. Conduct keyword research and optimize your metadata.
-
Misleading Thumbnails and Titles:
- Using clickbait thumbnails or titles that don’t accurately represent the content of your video can lead to viewer disappointment and dislikes.
-
Long and Unedited Videos:
- Lengthy, unedited videos with a lot of filler content can lose viewers’ interest quickly. Edit your content to keep it concise and engaging.
-
Inconsistent Upload Schedule:
- Inconsistent uploads can frustrate your audience and lead to lower subscriber retention. Stick to a regular schedule to keep your viewers engaged.
-
Neglecting Audience Engagement:
- Failing to engage with your audience through comments or social media can make viewers feel disconnected. Respond to comments and foster a sense of community on your channel.
-
Overlooking Thumbnails and Descriptions:
- Thumbnails and descriptions are the first things viewers see. Neglecting to create attention-grabbing thumbnails or informative descriptions can hinder your video’s performance.
-
Ignoring Analytics:
- Not reviewing your YouTube Analytics can lead to missed opportunities for improvement. Use data to understand viewer behavior, demographics, and which content is performing best.
-
Ignoring Copyright and Fair Use:
- Using copyrighted music or visuals without proper licensing or attribution can result in content takedowns or strikes on your channel. Be mindful of copyright laws and use royalty-free or licensed content when necessary.
-
Ignoring Community Guidelines:
- Violating YouTube’s community guidelines can result in content removal, channel strikes, or even the termination of your channel. Familiarize yourself with YouTube’s policies and adhere to them.
-
Neglecting Mobile Optimization:
- Many viewers watch YouTube on mobile devices. Ensure that your video and thumbnail are optimized for mobile screens and that any text is readable on smaller screens.
-
Disregarding Accessibility:
- Failing to provide closed captions or subtitles can make your content less accessible to viewers with hearing impairments and could limit your audience.
-
Monetization Before Eligibility:
- Attempting to monetize your videos before meeting YouTube’s eligibility criteria can result in disappointment. Focus on creating quality content and growing your audience first.
-
Overloading with Ads:
- Excessive ads can annoy viewers and lead to a higher likelihood of them skipping or abandoning your video. Be mindful of ad placement and frequency.
-
Not Promoting Your Content:
- Relying solely on YouTube’s algorithm to promote your videos may not be enough. Actively promote your content on social media and other channels to reach a broader audience.
By avoiding these common mistakes and continuously improving your content and channel, you can increase your chances of success on YouTube and build a loyal and engaged audience.
Conclusion
How to Upload Audio to Youtube from iPhone: Uploading audio to YouTube from an iPhone is a straightforward process that allows users to share their music, podcasts, or other audio content with a global audience. By following these simple steps, you can create a video with a static image or use third-party apps to convert your audio into a video format.
Then, use the YouTube app or website to upload your content, adding necessary details like a title, description, and tags.
Remember to respect copyright and community guidelines when sharing audio content on YouTube and engage with your audience to grow your channel and reach a wider listenership. With a little effort and creativity, your audio content can find its place on this popular platform.